Friday, 4 May 2012

Scene two


Problems
For some reason the z axis was not working as is evident by the picture below: 


After researching it I found that I somewhere along the line I must have accidently press x.  When I pressed it again I was able to move the z axis.  http://www.chiefdelphi.com/forums/showthread.php?t=58761

In order to get scene two done I pondered about using the earlier animation (Animation – path constraints & dummy) but for some unknown reason I couldn’t move the key along the frame so I could extend it with zoom out, because by the time the glider hits the floor (or appeared to have hit the floor) it would approximately be 19 frames.  Although it will be appropriate to make the glider fall really fast, I needed it to fly (or hang in the air) whilst making the glider flap its wings at least once.  So with all this in mind I felt it was prudent to draw another, shorter path.


I drew a slightly bent line like so:

I then moved it into position like so:


To add more vetex so I could move the line, i had to right click on the line and click on refine. 


The reason why I set the path constraints like the picture above is because the glider’s wings are going to coming down so that would lift it just a little bit.

As I thought more about how I’m going to animate it I came to the realisation that I might have to change the person the biped.

First things first, I had to apply the dummy and link the hip to it.  I did this by hiding the other elements/objects in the biped except the hip.  And I placed the biped on the glider, due to the proportional size of the biped it wouldn’t fit in the glider so I decided to make some changes to the glider.  I did this by selecting the glider and group > ungrouping it.  I first made the pedals longer like so:


There are some issues such as the arms not going through the rings as the picture above demonstrates.

Once I was happy with it, I pondered the quickest way to group the glider.

I clicked on ‘select by name’ and i selected all the objects that I thought made up the glider like so:


Next I had linked the glider to the dummy and the dummy to the path.

I first had to figure out how a person would fly the glider and came to the conclusion that when the wings are up the arms/wings go up, where as the knees are bent, vice versa when the wings are down. 

Then I had to ungroup the glider in order to animate it.
After hours of positioning and rotating, the wings, cameras, and other things I’m finally in a position to say that scene two is done. 
 

Scene 1


I had to first save it under a different name so that I could make some changes such as deleting the man (person), path constraints and the dummy, thus leaving the glider on top of the tower.  I then adjusted the camera to be as close up as possible.  The picture below is a the camera view.


I then selected auto () and set key () at frame 0. 
 

I went to the 175 frame and set a key:
 

I then had to place the camera in order to make it appear that it was zooming out.  I did this by placing the camera as far away as possible from the building, while at the same time having the target set on the glider.  The picture below is the outcome.


As you can tell from the picture below, not all of the objects are in view such as the top of the dome.  So I have decided to extend scene one and add some pans at the end of scene one.  I am now planning to add pan while the scene fades out as my story board suggests.
I did this by simply adding a set key at the 250th frame and then moving the target up:

Thursday, 3 May 2012

Animation – path constraints & dummy


The first thing I did was group the object together in order to manage them better.  Then I had to adjust the size to make it look realistic.  I made the building bigger.  The picture below is the result:


Using the path constraints I drew and adjusted a path using breeze to make it smoother:


I then applied dummy to see how it plays out.  The dummy is located in the create, helpers tab as the picture below demonstrates.


I then linked the man and glider to the dummy:

The next thing I did was check on follow and bank (motion tab) and slightly increase the bank so that it would bank slightly harder to the right.


Alternative
I thought about using the biped as a replacement for the person, but due to the fact that I’m running out of time, again, I felt it was the right decision to stick with the other model. Despite my slow start I felt that I have achieved the storyboard’s objective.  Especially, the part where the glider takes off from the building and pretends to fall.  The basic outline of the animation is done.  Now I have to animate and show how the person flies the glider.  It might be that I will have to use the biped as it will involve the person trying to fly and this moving his/her hand and feet, the model that I did will probably not be able to do that as it is too rigid.

morpher


In order to import the file that I needed to work with, I had to log in to the lab machines so that I could import it and save it, then transfer it so that I could work on it with my laptop.  This is due to the fact that my laptop would not let me import it as is evident by the picture below. 


I then made four copies, naming each one so that I would know what one is what. 


After naming them I had to zoom in very close and select the following polygons by holding down CTRL and selecting them:


As you can see ‘ignore backfacing’ is checked.  With these polygons selected I clicked on grow 3 times.


Until I turned the head around and realised that if i pressed it one more time it would go above the bottom jaw like so:


So I manually selected them, both sides:


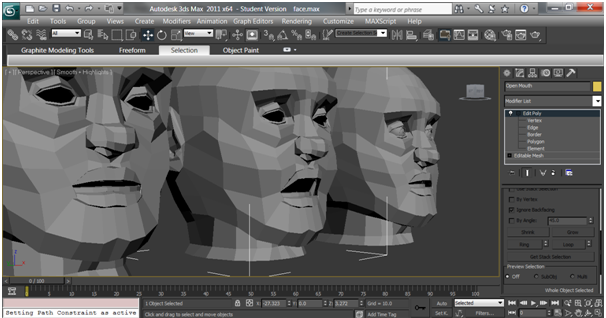
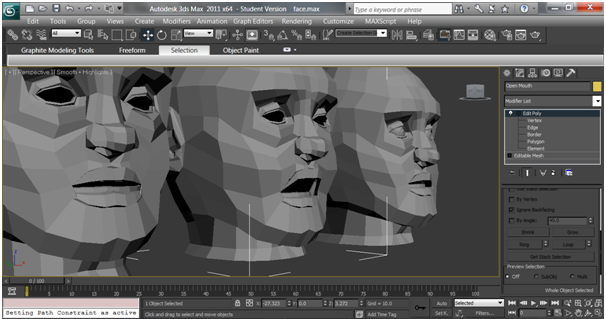
Next I selected the move tool and adjusted the mouth to make it appear it was talking like so:


After selecting Morpher from the modifier list, i right clicked on the first ‘empty’ button and selected the ‘pick from scene’ which finally allowed me to select the ‘open mouth’ head.


As I increased the number, the mouth moves, or it looks like its moving:


I did the same for the eyes and eyebrow:


Finally, I applied turbosmooth from the modifier list and rendered it:


Thursday, 5 April 2012

introduction to animation on 3d


Animation basics


In the picture above I have moved the Time Slider to 20/100, and clicked on Auto.   Note that there is a red rectangle on 0 (blue means that the object is uniforming and green means rotating), which means that the object has been moved, it’s also the ‘key frame’ where it will show that the object has gone a different direction as I shall demonstrate now. 

To get a better control over my object(s) I clicked on the open mini curve editor, which is located at the bottom-left corner of the screen ().


As you can see from the picture above, I have modified it so that it moves in all direction. 


In order to extend the frames to 300, I had to click on time configuration (), which is located in the bottom right hand side of the screen.  The picture below shows the time configuration.

Path constraints

Fist I drew a couple of objects so that the camera can focus on.  Then I drew a circle from the shapes tabs.  I first tried to edit the vertex poly so that it would give the camera more of a view.   But that didn’t work as is evident by the picture below.


Turned out it was meant to be ‘edit spline’ not ‘edit poly;

Nevertheless, I went back to basics and this is what my path is looking like:


Camera tab:

Target:


Drag from the circle to the centre like so:


Animation >constraints > path constraints


Click on the circle to make the camera follow the path.


In order to see the camera perspective I press c as is evident by the picture above.  To zoom in or out (camera lenses) I clicked on the modify tab, as is evident by the picture below.

 Apply almost the same thing for free camera, press ‘free’ instead of target.